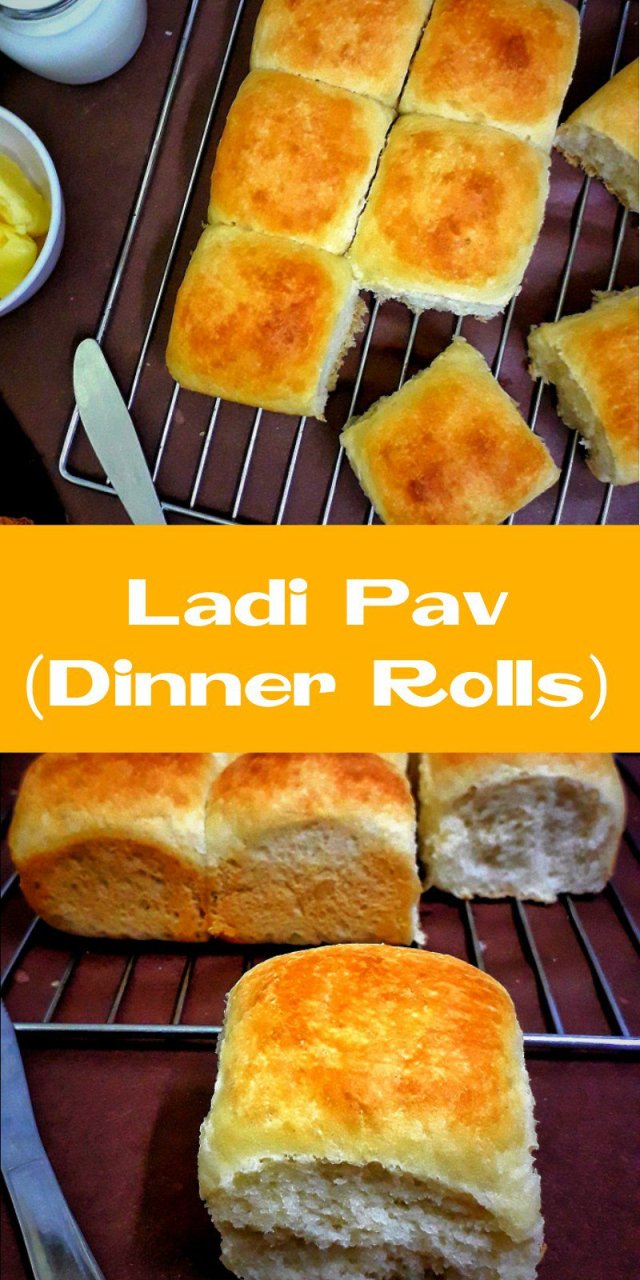
Eggless Ladi Pav (Dinner Rolls)
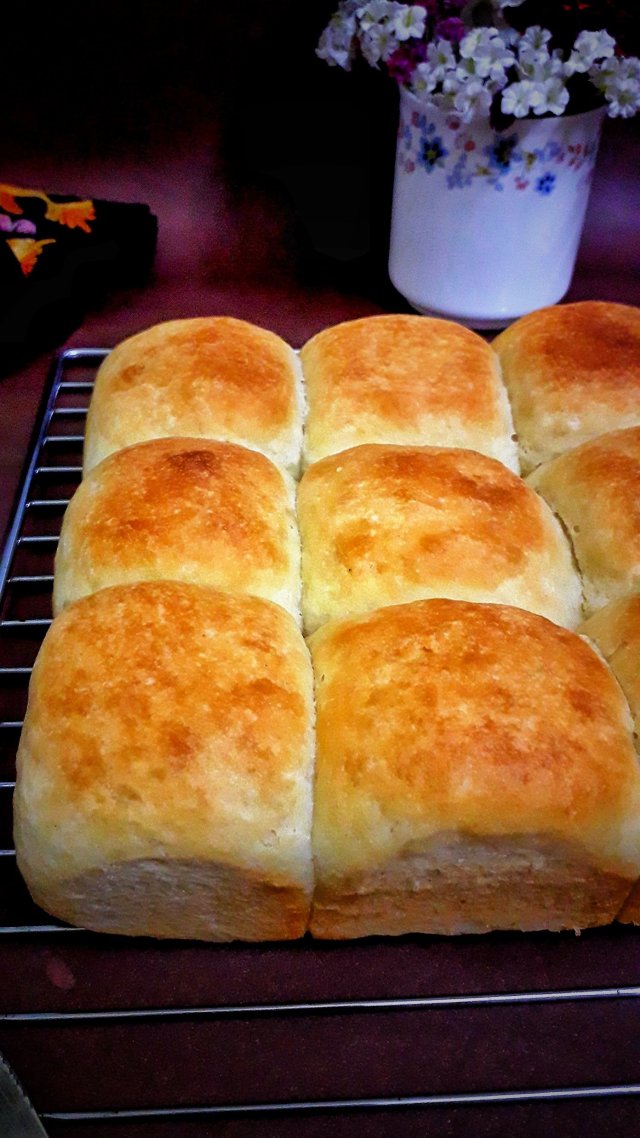
Soft, spongy and fluffy; these homemade ladi pav aka dinner rolls are so addictive and impossible to resist that you would keep coming back for more. Who doesn’t love a freshly baked homemade bread? When it comes to baking, there’s nothing which can beat the aroma and taste of the freshly baked homemade bread.

These eggless pav are suprisingly simple and easy to make at home and taste so much better than store bought ones. These homemade pav turned out fabulous and makes a perfect meal when paired with Indian street food like bhaji, vada, misal etc.
If you are looking for light, fluffy, and perfectly-proofed homemade ladi pav buns, then this is the recipe for you! These homemade ladi pav aka dinner rolls recipe is a keeper. It’s one of the easiest things to make and looks so elegant and tastes amazingly delicious!

As much as you love these homemade ladi pav, you will love this Twisted Tutti Frutti Rolls recipe too!
To satisfy our craving and especially my little one, I started baking this homemade breads at home. All I wanted to have was an easy straight forward recipe without any fancy ingredients, something that is eggless and can be made in simple steps.
Yes, this recipe is that simple. Just combine the ingredients, knead, proof shape it and bake to make delicious homemade dinner rolls. How easy is that!!
I have a super easy Irish Flatbread recipe too and it’s much different and simpler than other bread recipe – no yeast, no kneading, no proofing. Isn’t it that simple? Enjoy it as a breakfast or as a quick dinner with your favourite curries.
WHAT IS LADI PAV?
Ladi means a line/group and pav refers to bread. So ladi pav means a group or small rolls of bread joined together wherein you pull one roll from the slab and consume it.
These are also called Pull apart buns and dinner rolls.
Ladi Pav is a very popular bread from Mumbai, a staple bread in the Maharashtrian cuisine. It’s actually what a common man in Mumbai eats almost everyday for breakfast.Pav bhaji is one of the dish that makes it to the top of favourite list. Pav bhaji is one of the most popular street food of India and it is said that we get the best pav bhaji in Mumbai.
The Bhaji, which is mashed veggies. Potatoes, cauliflower, peas, beans, carrot, bell pepper, tomato, onion and ginger garlic paste are commonly used. All the veggies are boiled and then mashed and cooked with a special blend of spices in butter and oil. It is lip-smacking good!
LET’S TALK INGREDIENTS
To make these homemade pav you only need flour, yeast, butter, milk powder, sugar and milk. (salt if using unsalted butter). To make Soft Pillowy Dinner Rolls, you will need 6 ingredients that are easily available in most households. These simple ingredients when combined together result in soft and delicious pav! You need to make this!
● All purpose flour (maida) – You can use all purpose flour or bread flour in this recipe. You can use whole wheat flour too. The rolls would be a little bit dense and not as light and fluffy. I recommend using the 50:50 ratio of all purpose flour and wheat flour.
● Milk powder – Milk powder acts as an enrichment in this recipe.
● Yeast – I have used active dry yeast. However you can also use instant yeast as it can be directly added to the flour.
● Milk – I have used whole milk. Milk adds richness to the dough resulting in soft crumb, tender and golden crust pav buns. I recommend using whole milk for extra richness. Milk can be substituted for water or can be used in the 50:50 ratio.
● Sugar – Sugar feeds the yeast and helps in activation. Yeast will bloom faster if it has sugar so dont skip adding sugar.
● Butter – Butter makes the pav rich. Room temperature butter will work best! I have used salted butter so I skip the salt in the recipe. You can add ¼-½ tsp salt if you’re using unsalted butter.

I made a simple recipe video of this hearty chicken stew with vegetables recipe for my readers which I have shared below. Please do watch and SUBSCRIBE to my channel if you haven’t yet. It will mean a lot to me and motivate me to come up with more videos for my readers. As always looking forward to your feedbacks!
Ladi Pav Tutorial Video
VARIATIONS AND SUBSTITUTIONS
● To make this recipe healthy, use whole wheat flour. The rolls would be a little bit dense and not as light and fluffy. I recommend using the 50:50 ratio.
● All yeasts will work in this recipe. If you have instant dry yeast, it can be added straight to dry ingredients and doesn’t require any sitting or proofing. Active dry yeast needs to be dissolved in a liquid before adding to the recipe.
● You can add ½-1 teaspoon baking powder for extra light and fluffy texture.
● To make this recipe vegan, use almond milk instead of regular milk, skip the milk powder or use dairy free milk powder if available and use oil instead of butter.
● You can use the same recipe to make bread and burger buns.
● You can substitute the milk wash with egg wash.
TIPS AND TRICKS TO MAKE PERFECT HOMEMADE PAV
● Yeast is the backbone in bread baking. It is important to activate the yeast if you’re using dry active yeast before proceeding with the recipe. It will take atleast 5-10 minutes for the yeast to get activated. Please do not rush or the recipe will be a flop. Let the yeast rest undisturbed and let it do its work.
● Always double check the shelf life of your yeast before starting to make any bread. If your yeast is expired or exposed, the yeast will not activate and the dough will not rise.
● Always use lukewarm milk or water to activate the yeast. The right temperature of the milk is very important here. Too hot milk will kill the yeast and the yeast won’t activate.
● Sugar is an essential ingredient. Yeast feeds on sugar, and sugar helps the yeast to become bubbly and frothy.
● Kneading dough is an essential step in bread making. Kneading helps to develop the gluten and make the pav soft.
● Avoid adding extra flour. Adding more flour will end up in hard pav. If you feel your dough is sticky and hard to handle, just sprinkle little flour at a time and still it is sticky then simply grease your hands with butter as required and knead the dough.
● Once the dough is kneaded, it needs proofing and rise time. Also the dough needs to place in a warm place. The temperature plays a crucial role in bread rise.
● Punch down and knead the proofed dough. Kneading the proofed dough for 2-3 minutes will help release additional air bubbles incorporated inside. It helps produce a beautiful texture of the ladi pav and helps the dough to rise well during the second proofing.

● The best way to make sure that your rolls are equal in size is to weigh them using a kitchen scale. Weigh the entire batch of dough using a kitchen scale and divide them accordingly. Its available at Amazon 👇

● Getting a perfectly baked pav depends upon the perfect 1st and 2nd proofing. If this is achieved nothing will go wrong. Just bake the pav as directed. Once it is baked the top surface will be hard, but do not worry, it will turn soft as it cools down. Just brush butter immediately once the pav is out of the oven, cover and keep for about 10 minutes.
● The correct pan size also matters alot to retain the shape and get a perfect shaped ladi pav. Due to too much space between each pav because of incorrect or large size pan, the pav will spread flat in the pan instead of rising upwards. And this is where it loses its shape. So, if you prefer your pavs to be squared and uniformly shaped pull-apart rolls, just like the store-bought ones, then bake them in the right pan. This way you’ll get a perfect pull-apart pav buns. I’ve shared the link of the pan which you can purchase from Amazon.
Please click on the image if you wish to purchase these products from Amazon.


FAQ
What kind of yeast can be used?
You can use any type of yeast; instant yeast, active dry yeast or fresh yeast. I have used active dry yeast. However you can also use instant yeast as it can be directly added to the flour. If using Fresh Yeast use three times the amount of what the recipe calls for.
Why does my pav (bread) have a yeast smell?
If your oven is not pre-heated and is not the right temperature then your pav bakes unevenly, remains under baked and you get yeast smell in your bread. The oven temperature should not be too hot or too low. If everything is followed perfectly and still you get the smell then I recommend you to reduce the amount of yeast a little bit than what is called for in the recipe.
What should be the oven temperature to bake this ladi pav?
It is either bake at 180° C or 200° C depending upon your oven temperature settings.
On which rack and mode should you bake these Ladi pavs?
The tray should be kept at the middle rack with both rods switched on.
Can we bake the ladi pav in glass baking ware?
Yes. You can bake them in glass baking dish but the baking time will be slightly longer than the others.
Why my rolls turned out dense?
The reason of your rolls been dense could be – not kneading the dough enough to form gluten which result in denseand heavy crumb.It is also because of mixing the salt and yeast together which retard the yeast activity
What makes the bread soft and fluffy?
Milk powder and milk make this bread super soft and rich. I would recommend not to skip this.
HOW TO STORE THIS PAV OR DINNER ROLLS?
Place the dinner rolls in an airtight container or ziplock bag. They stay good for 3-4 days at room temperature.
You can also store in refrigerator for longer period. For serving, just take them out from the refrigerator few minutes ahead of serving time. Apply butter slightly and reheat them in the microwave for few seconds or oven in for few minutes.
SERVING SUGGESTIONS
I Usually make pavs to be served with bhaji, vada, misal, masala, egg bhurji or samosa pav. These pav bun can also be used for making sandwich or cane be served with butter and jam.
Check out some of my latest baking recipes
Eggless Chocolate Sponge Cake
Banana Nut Bread (Quick Bread)
Eggless Lamingtons
Vanilla Custard Pinwheel Cookies
Thumbprint Cookies
Gluten Free Vanilla Cake
3 Ingredient Cookies
Quick Mango Bread
Milk Powder Cake
Banana Choco Chips Cookies
Homemade No Yeast Pizza
If you’re looking for some easy eggless cake recipes, do have a look HERE
All of the above recipes are super easy to prepare, ready in no time, and will never disappoint you.
These ladi pav bun is feather light, soft, spongy, and fluffy with a good flavor, hearty texture and extremely delicious. This dinner rolls recipe is such a basic one This is a fail-proof recipe which have been tried and tested many times. Moreover this dinner rolls recipe is such a basic one that you would end up making it over and over again!
So let’s get started with the recipe. Do share your thoughts about the recipe with me here. I would love to read it.

Preparation time: 1 hour 30 minutes
Baking time: 25 minutes
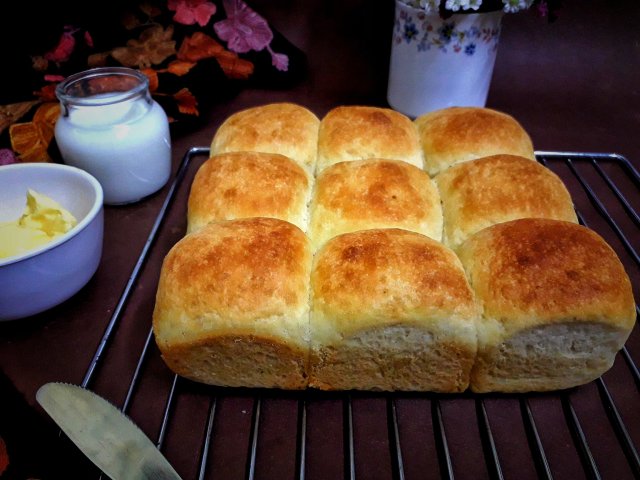
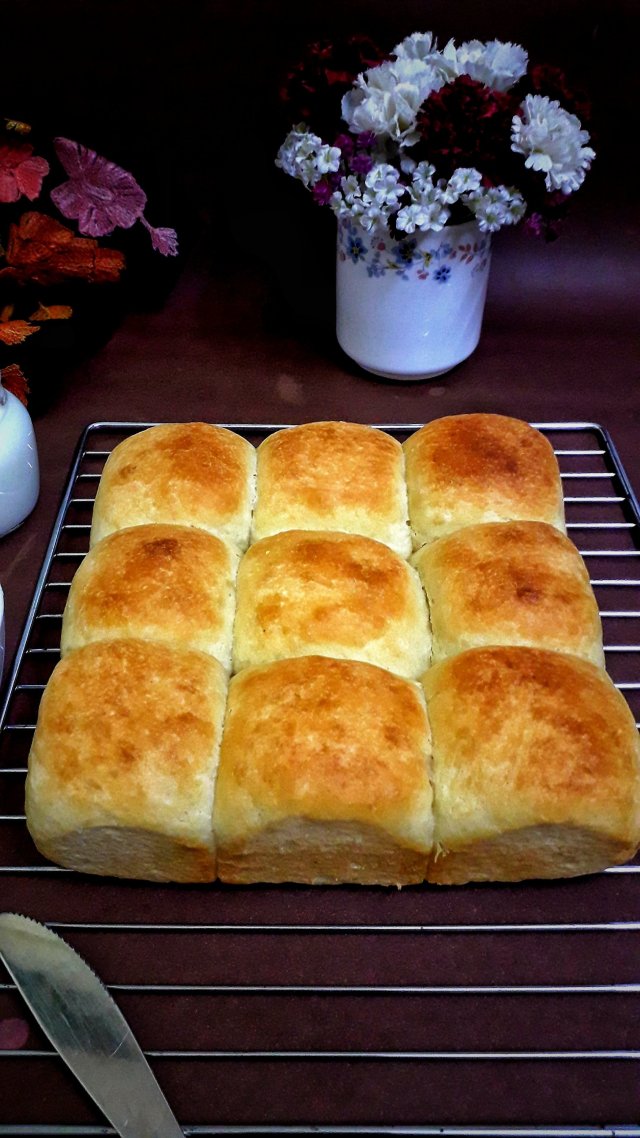
Yields: 9
☆ 1 cup = 240 ml
☆ 1 tablespoon = 15 ml
☆ 1 teaspoon = 5 ml
☆ Baking pan size = 7.5 inches diameter × 2.5 inches height
Ingredients to make ladi pav:
2½ cup All purpose flour (Maida)
1¼ cup warm milk (300 ml)
1 tsp yeast
1tbsp sugar
2 tbsp milk powder
2 tbsp butter
1-2 tbsps extra Milk and butter for brushing
Step by step pictorial instructions to make ladi pav:
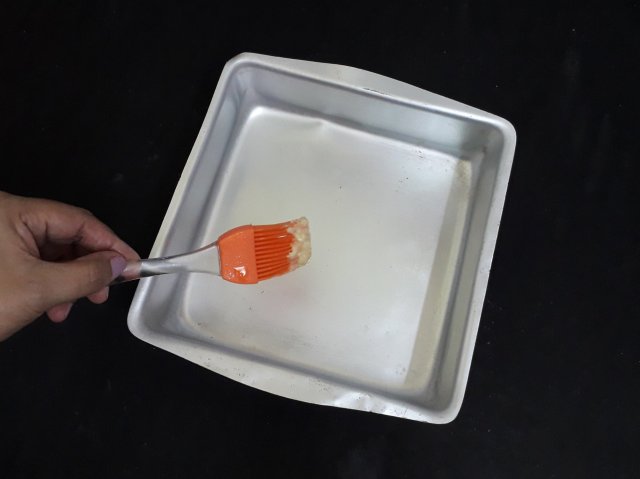
PREPARING THE PAN AND OVEN
Grease the pan with butter and set aside. Preheat oven @180°C for 10 minutes.
ACTIVATE THE YEAST
In a bowl add ½ cup warm milk, sugar and yeast. Mix well, cover and set aside for 5-10 minutes until it becomes thick, foamy, and bubbly.
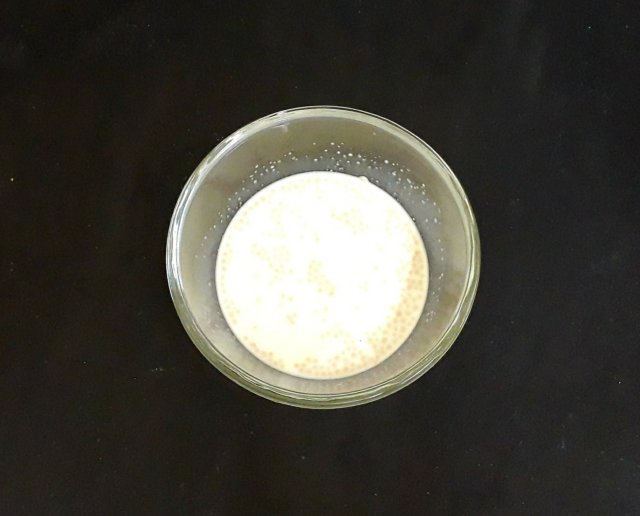
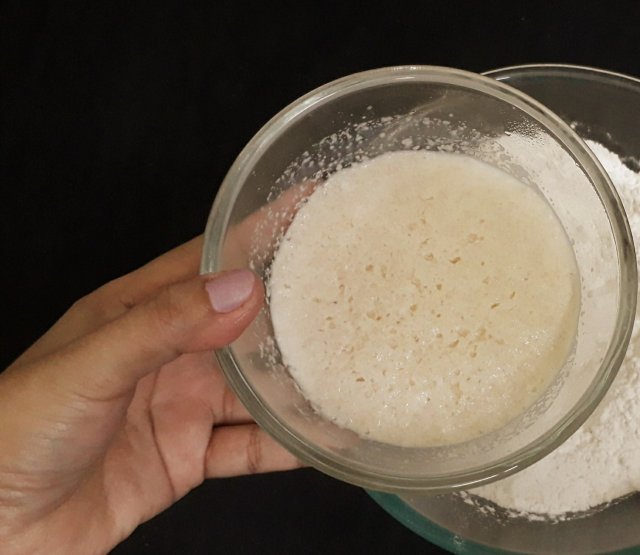
This proofing procedure shows that yeast is alive and active. Yeast needs to foam up (become frothy and bubbly). If it doesn’t then discard and start all over again. Still it doesn’t work then change your yeast.
PREPARE THE DOUGH
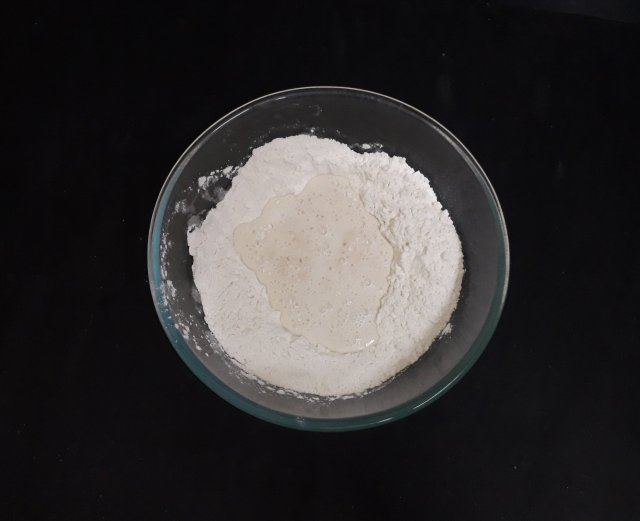
In a large mixing bowl add sieved flour and milk powder. Mix and incorporate them well.

Make a well in the center and add the activated yeast. Mix to combine.
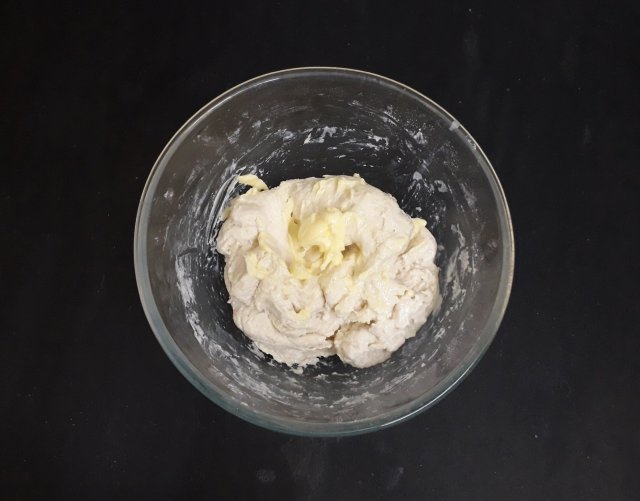
Now add the milk in batches and knead to form a soft, pliable dough.
Add butter and incorporate the butter in the dough. Once the dough is blended, it will turn soft and non-sticky.

Do not add all the milk or water at once. Add water as needed since the water absorption varies depending upon the variety of flour.
KNEAD THE DOUGH
Take the dough out in a clean surface and knead the dough for 5-10 minutes using stretch and fold method as shown in the video and picture below.
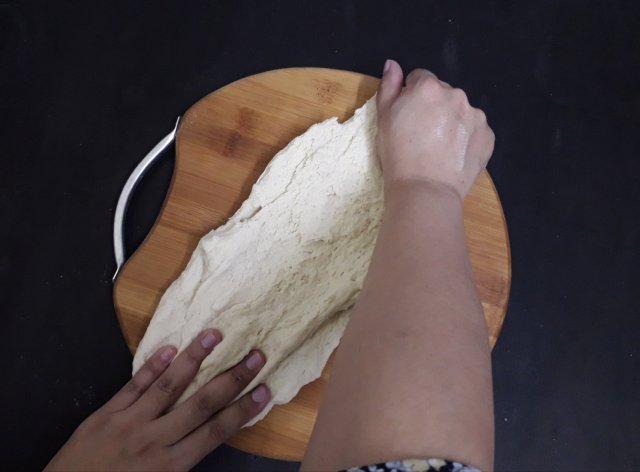
This step is important to develop the gluten and make the pav soft. Your dough is done when it looks smooth and springs back when you poke it.

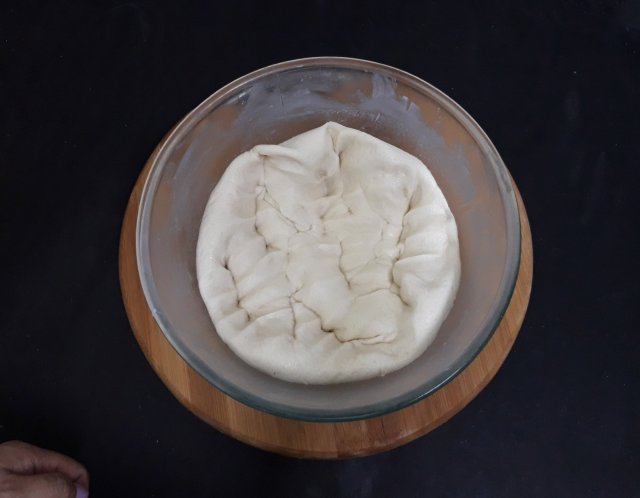
PROOFING THE DOUGH
Grease the bowl lightly with a bit of butter or oil. Place the dough in the greased bowl, cover the dough with cling wrap or a plate and keep in a warm place for proofing for 45 minutes to 1 hour until doubled.

The dough has beautifully proofed and doubled in size.

Remove the cling wrap and gently punch down the dough to flatten and remove the incorporated air.
Take out the dough and gently knead it for 2-3 minutes.
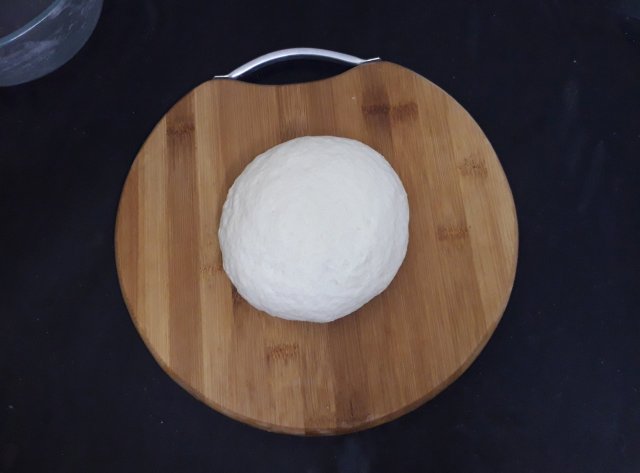
SHAPING AND SECOND PROOFING
Divide the dough into 9 equal portions.
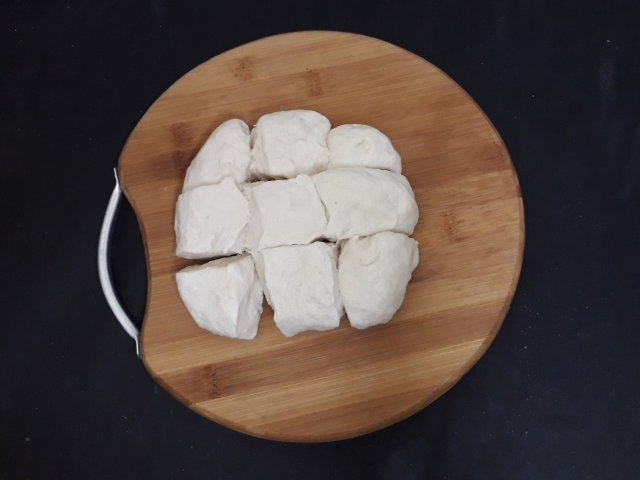
Shape all the portions nicely into smooth balls with the help of your palms and place it in the prepared pan leaving a little space between each dough ball. They will expand and spread as they rise.

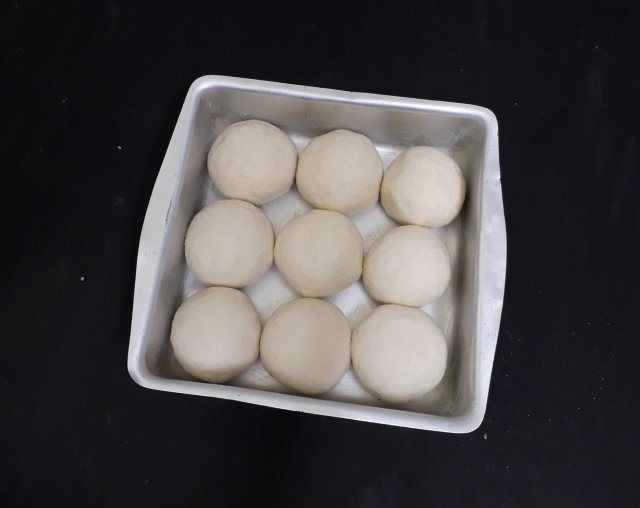
Cling wrap the prepared pav or cover them with a damp cotton cloth and set aside for 20-25 minutes un a warm place.
After the rise period, the buns will expand and fill up all the empty space. They are now ready for baking.

BAKE THE PAV
Remove the cling wrap and brush the pav with milk and sugar mixture gently. (you may just use milk or may do egg wash).

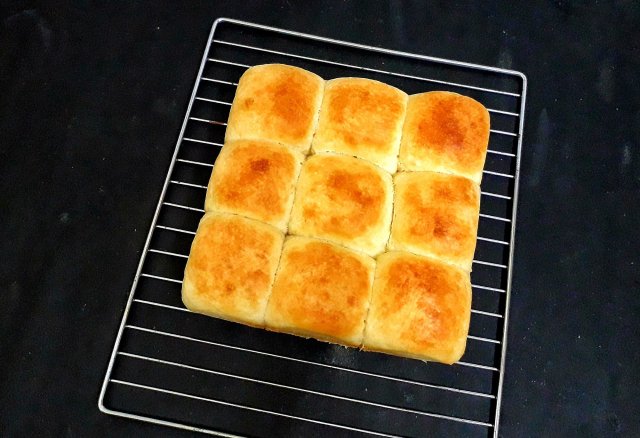
Bake the pav at preheated oven @180°C with both rods switch on for 20-25 minutes or until the top surface is golden brown.

Please note that the top surface of the pav will be hard but do not worry it will turn soft once it cools down.Remove from the oven and immediately brush the pav lightly with butter and cover them with a clean towel for about 10 minutes.

Demould from the pan and let it cool down completely in a cooling rack.
Enjoy the pav or dinner rolls the way you like. My little one finished off 3 pav immediately once cool down with butter jam 😃.
NOTES:
● All purpose flour can be substituted with whole wheat flour or can use the 50:50 ratio.
● Always sift the flour atleast twice.
● Always use a good quality and fresh yeast for best result.
● Always use lukewarm milk to activate the yeast.
● It is important to activate the yeast if you’re using dry active yeast before proceeding with the recipe.
● Do not proceed if your yeast is not activated.
● Any baking recipe, be it bread, pastry or cake, need to hit the hot oven. So always ensure to preheat your oven for perfect results.
● Keep your dough covered at all times; while proofing, shaping and dividing the dough in order to avoid the drying of the dough.
● Use the correct pan size. Too large size pan will make the bun spread flat and lose its shape.
● Immediately brush butter on the pav once it is out of oven for glossy effect and also it makes the bread softer.
● Remove the baked pav from the baking pan after about 5-10 minutes and allow to cool on a wire rack to avoid the base of the pavs from getting soggy due to condensation if left in the pan itself.
RECIPE CARD

Ladi Pav ( Dinner Rolls)
Equipment
- OTG
- Mixing bowl
- 7.5 inches square pan
- 240 ml measuring cup set
Ingredients
- 2½ cup all purpose flour (320 grams)
- 1¼ cup warm milk (300 ml)
- 1 teaapoon yeast
- 2 tablespoon sugar
- 2 tablespoon butter
- 1-2 tablespoon butter and milk extra for brushing
Instructions
Prepare The Pan And Oven:
- Grease the pan with butter and set aside. Preheat oven @180°C for 10 minutes.
Activate The Yeast:
- In a bowl add ½ cup warm milk, sugar and yeast. Mix well, cover and set aside for 5-10 minutes until it becomes thick, foamy, and bubbly.
- This proofing procedure shows that yeast is alive and active. Yeast needs to foam up (become frothy and bubbly). If it doesn’t then discard and start all over again. Still it doesn’t work then change your yeast.
Prepare The Dough:
- In a large mixing bowl add sieved flour and milk powder. Mix and incorporate them well.
- Make a well in the center and add the activated yeast. Mix to combine.
- Now add the milk in batches and knead to form a soft, pliable dough.
- Add butter and incorporate the butter in the dough. Once the dough is blended, it will turn soft and non-sticky.
- Do not add all the milk or water at once. Add water as needed since the water absorption varies depending upon the variety of flour.
Knead The Dough:
- Take the dough out in a clean surface and knead the dough for 5-10 minutes using stretch and fold method as shown in the video and step picture above.
- This step is important to develop the gluten and make the pav soft. Your dough is done when it looks smooth and springs back when you poke it.
Proofing The Dough:
- Grease the bowl lightly with a bit of butter or oil. Place the dough in the greased bowl, cover the dough with cling wrap or a plate and keep in a warm place for proofing for 45 minutes to 1 hour until doubled.
- The dough has beautifully proofed and doubled in size.
- Remove the cling wrap and gently punch down the dough to flatten and remove the incorporated air.
- Take out the dough and gently knead it for 2-3 minutes.
Shaping And Second Proofing:
- Divide the dough into 9 equal portions.
- Shape all the portions nicely into smooth balls with the help of your palms and place it in the prepared pan leaving a little space between each dough ball. They will expand and spread as they rise
- Cling wrap the prepared pav or cover them with a damp cotton cloth and set aside for 20-25 minutes in a warm place
- After the rise period, the buns will expand and fill up all the empty space. They are now ready for baking.
Bake The Dinner Rolls:
- Remove the cling wrap and brush the pav with milk and sugar mixture gently. (you may just use milk or may do egg wash).
- Bake the pav at preheated oven @180°C with both rods switch on for 20-25 minutes or until the top surface is golden brown.
- Please note that the top surface of the pav will be hard but do not worry it will turn soft once it cools down.
- Remove from the oven and immediately brush the pav lightly with butter and cover them with a clean towel for about 10 minutes.
- Demould from the pan and let it cool down completely in a cooling rack.
Video
Notes
- All purpose flour can be substituted with whole wheat flour or can use the 50:50 ratio.
- Always sift the flour atleast twice.
- Always use a good quality and fresh yeast for best result.
- Always use lukewarm milk to activate the yeast.
- It is important to activate the yeast if you’re using dry active yeast before proceeding with the recipe.
- Do not proceed if your yeast is not activated.
- Any baking recipe, be it bread, pastry or cake, need to hit the hot oven. So always ensure to preheat your oven for perfect results.
- Keep your dough covered at all times; while proofing, shaping and dividing the dough in order to avoid the drying of the dough.
- Use the correct pan size. Too large size pan will make the bun spread flat and lose its shape.
- Immediately brush butter on the pav once it is out of oven for glossy effect and also it makes the bread softer.
- Remove the baked pav from the baking pan after about 5-10 minutes and allow to cool on a wire rack to avoid the base of the pavs from getting soggy due to condensation if left in the pan itself.
Disclosure: At My Kitchen is an Amazon Affiliate, which simply means that if you make a purchase through these links, I will earn a very small commission at no additional cost to you!

Well, if you make this soft ladi pav, please do leave a feedback in the comments box below or snap a photo and tag Akum Raj Jamir on Facebook and akumrajjamir on Instagram with hashtag #atmykitchen. I would love to see your creations.
Thank you so much for stopping by my blog. I hope you liked the recipe. Your valuable feedbacks are always welcome, I love hearing from you guys and always do my best to respond to each and every one of you.
Happy cooking!
Love Akum
MORPHY RICHARDS OTG

MORPHY RICHARDS MICROWAVE CONVECTION


Excellent
Very nice ♥
Thanks much Suman 😍
Hi Akum,
Beautiful paavs !!!
Could you please let me know, which microwave/otg you are using?
– Thanks !!!
Veena Katiyar